Paul Gitsham
  • Welcome!
  • News
  • Books
  • Blogs
    • Writing Tips
    • Recommended
  • Newsletter

Writing Tips Blog

#TuesdayTip
Newsletter
Picture
Breaking News!
DCI Warren Jones 9, Web Of Lies, Out Now!
​Click Here To Visit My Writing Page (opens in a new window).
​Free Download!
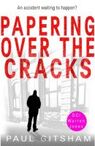
Papering Over The Cracks - A DCI Warren Jones short story
(Includes a sneak preview of Web Of Lies)
Picture

TuesdayTips131

17/1/2023

0 Comments


Back It Up!

Picture
About fifteen years ago, I was asked to be a best man (he repaid the favour last year). One of the most important duties, after not losing the rings, is to deliver the best man's speech after the wedding breakfast. For weeks, I slaved over my address, before finally finishing what I hoped was a suitably touching, amusing and not-too-impolite tribute to my closest friend and his beautiful wife-to-be.
A little under a week before the wedding, I returned home from work, where I had been using my personal laptop (I was just starting and had yet to be assigned my own work laptop). I went to turn it on … and nothing happened. Dead as a doornail! There was no hope of getting it repaired anytime soon, and I would need a new one anyway, so I forked out for a replacement. I successfully removed the hard drive, placed it in an external USB caddy and plugged it into the new machine to find that to my relief, there was nothing wrong with it. Except for one tiny problem. It was encrypted and I had no way of unlocking the files. It's still in a box somewhere, encrypted and useless; I really need to securely dispose of it.
Mercifully I didn't lose too much work, as I'd backed everything up onto CD-ROMs and DVDs (remember those?) but my best man's speech was gone.


The moral of the story? BACK UP YOUR WORK.
Of course I'm not alone. The late, great, Jilly Cooper famously left her only paper copy of the manuscript for 'Riders' on a bus in 1970. She didn't finish rewriting it until 1984.
These days, there is no excuse, given that most writers use a computer. Back in the 1980s floppy discs were the way to go. These were superseded in the 1990s by CD-Roms and USB memory sticks. If you had the resources, an external hard-drive could be used to keep a second copy of all your files.
These were fine, but not much use if your house burned down and both your computer and your backup were destroyed. As internet connectivity became more popular, some writers hit upon the idea of emailing a copy of their work in progress to themselves at the end of each working day. Assuming your email provider didn't disappear overnight, it would be safely sitting on Microsoft, or Yahoo or LycosMail's servers when you resumed work the following day.


But the problem is that's a faff. And you can still lose a day's work if your computer crashes before you've sent your daily backup.
Now, with the ubiquity of online cloud storage which can be set to record incremental backups every couple of minutes, in theory you shouldn't lose a single word.
Hah! That's fine until you realise that you set it up wrong, or your tech giant of choice suffers a major data breach. 


These days, reliance upon one method for backup is not recommended.
What you should aim for is both a physical backup - e.g. an external hard drive or USB memory stick which can protect you if your computer's hard drive should fail - and a remote, off-site backup in case your house catches fire. You could email it to yourself, but these days, cheap or free cloud storage systems are far more convenient.
I'm no computer expert, but I mix and match a couple of systems. I have an external hard drive that backs up my laptop's hard drive completely and also saves all changes to files as I go along. In theory, not only does this protect my valuable data, it also contains everything necessary to completely restore my laptop and its software and settings, should it die an unexpected death.
My off-site back up is two different cloud storage systems.
Now before we go any further, I have no idea if this is a sensible set-up, and take no responsibility if it doesn't work for you, but I've been happily using it for years.
The way it works, is to place one cloud storage system inside another.
I have a Microsoft OneDrive account that gives me 1,000Gb of space. I also have a Google Drive account which gives me 100Gb of space.
The folder that Google Drive syncs to is inside the folder that OneDrive syncs to. Anything that is really important, such as my writing or paperwork etc, is saved into a folder in the Google Drive.
Less important stuff is saved directly into OneDrive.
Everything in the Google Drive is therefore saved to both Google and Microsoft. I routinely access these files on other devices, such as my phone, tablet and an elderly mini-laptop, and the files are accessible whether I log onto Google Drive or OneDrive.
The only caveat, is to be patient when closing down your computer - give both the Google and Microsoft apps time to complete syncing.
You will also need to have at least one device that has both Google Drive and OneDrive running, and to use that device regularly, that way the files inside Google Drive will be synced to both cloud services.


As for the best man's speech - it was lost forever. Unable to rewrite it from scratch, I was able to remember the key points and jokes, and so wrote myself a bullet-pointed list of prompts, stayed off the booze just-in-case, and delivered it off-the-cuff. I'm told it was far more natural and relaxed than if I had read out a pre-prepared speech word-for-word, and I even ad-libbed.
Another bonus was that the one joke I forgot turned out to be the only joke that would have actually caused offence (entirely innocently; I had no idea it touched upon a slightly sore point with the groom's mother going back to childhood - I told the groom the joke later and his response was 'thank God you didn't say that'.)


Do you have any tales of woe, when it comes to losing work? Do you have any tips about how to back-up data safely?
As always, feel free to comment here or on social media.
Until next time, keep you, your family and your data safe.
Paul
0 Comments

TuesdayTips130

10/1/2023

0 Comments


Book Review.
Murder Investigation Team:

How Killers Are Really Caught.
Steven Keogh

Picture
Buy From Amazon.
​Buy From Bookshop.org to support independent sellers.
Welcome back, and a Happy New Year! This week's #TuesdayTip is a review of a fantastic book I received for Christmas.
Murder Investigation Team - How Killers Are Really Caught - is a brilliant account from recently retired Scotland Yard detective inspector Steven Keogh.
Released in 2022 (and containing data up to March 31st 2020 when things changed somewhat!), this is an in-depth insight into the process of solving murders and taking them to trial.
Although it deals specifically with the Metropolitan (London) Police Service, who divide Greater London into autonomous Murder Investigation Teams (MITs) and thus might be operationally slightly different to the way other police forces deal with such crimes, most of it is generally applicable to other forces in England and Wales.


Unlike some books, which are more like reference guides designed to be dipped into and out of, this can be read cover to cover (which I did over three days). I was really impressed with it, and heartily recommend it to authors writing British Police Procedurals, and non-writers who want to learn more about what really goes on. Keogh's writing style is both personal and personable and very accessible, without feeling patronising for those with previous knowledge. It feels almost as if he has been invited to give a lengthy talk to a room full of interested laypeople. And I mean that as a compliment and endorsement.

Divided into chapters, he first takes us through some of the technicalities of what is murder, how it differs from manslaughter and some of the potential defences or partial defences (ie when you would push for a murder prosecution, when you might decide no offence has been committed, and why a person might be convicted of manslaughter, rather than murder). He also describes the structure of an MIT (it might be subtly different in other forces) and the roles of individuals.

The remainder of the book is broadly chronological, dealing first with the crime scene(s). This includes forensics and what they are specifically looking for. Of particular note is the section on phone data. Keogh is fascinated by this and voluntarily took on this role in many investigations, so he has real expertise.
The next chapter is the longest and concerns the investigation itself, but is sub-divided. He looks at investigative thinking, lines of investigation and the arrest and interview of suspects. In this subsection, he describes how modern interviews are conducted. There is then a section where he answers some of the questions that people regularly ask.
Finally, there is a chapter describing a trial and the aftermath.

Throughout the book, he illustrates his points with anonymised case files. As a mark of respect, he doesn't name any victims or suspects, although afficionados of true crime will probably recognise some of the more well-publicised cases. He also has regular "Myth Busters" and "Did You Know?" facts. All crime fiction writers accept that the relating of an investigation in exacting detail would be rather less exciting than they hope for, but I'm a firm believer in the adage that to break the rules, you need to know the rules first. Knowing how your book needs to differ from real life for dramatic purposes can help you choose what liberties to take, whilst minimising the gnashing of teeth (and smart-arse Amazon reviews) of the armchair detective.

The book is refreshingly honest. Keogh is not afraid to admit to mistakes that he and his team have made, and the learning that came from them, and whilst the book is understandably very pro-police, he admits to failings. He is also quite happy to point the finger where necessary at the impact of government cuts, the sometimes cut-throat and often underhand or callous tactics of defence barristers, and the sometimes inexplicable decisions made by juries. Throughout it, he is clearly in awe of the dignity shown by victims' loved-ones.

My wife, who is not a writer, commented that she is looking forward to reading it next because it looks really interesting. I think she'll thoroughly enjoy it, and so will you.

Steven Keogh runs The Murder Academy website that looks at True Crime and the solving of crimes.
0 Comments

TuesdayTips129

20/12/2022

0 Comments


TV Review
24 Hours In Police Custody

Picture
For today's #TuesdayTip, I have chosen to review a TV documentary series that I highly recommend for those seeking an authentic insight into UK policing.
If true crime is what you are after for your TV viewing, there is no shortage of programmes to choose from. There are whole channels that are devoted to it. But the quality varies enormously, from the down-right sensationalist to the truly insightful. Unfortunately, you can't always be certain what you are tuning into. Some of the US series in particular are quite bad.
Furthermore, police procedure varies enormously between the US and the UK, so if you are looking to write a UK police procedural they are of limited use. That's not to say they should be dismissed out of hand; I've certainly found inspiration for plot ideas over the years.
However, if you want an authentic UK-based series (specifically England and Wales - Scotland and Northern Ireland have slightly different justice systems), I heartily recommend 24 Hours In Police Custody. Aired on Channel 4 in the UK, many (but strangely not all) programmes are archived on the free All 4 streaming service.

The name of the show is something of a misnomer
, and is why I was rather late to the party, only finding it during lockdown. It conjures up images of fly-on-wall scenes from cameras above the custody desk as an endless parade of drunken idiots are booked into the cells for the night - think Big Brother, but everyone is wearing a grey tracksuit. However it is far from that.
Based primarily in Luton, it follows detectives from Bedfordshire police as they solve serious crimes. Camera crews follow them from the initial 999 call right through the investigative process, including interviews with witnesses and suspects, candid discussions with the detectives and specialists involved, and occasionally victims' loved-ones. Forensic specialists are shown going about their business and if necessary, the science explained. Sometimes body-worn camera footage is also shown. My wife and I sometimes joke that you can guess who is guilty, as they are the only person who hasn't had their face pixelated for legal reasons!
An individual episode might span several years, with the programme only aired once all the legal proceedings are completed (and the outcomes are given before the end credits). There are a couple of special episodes that pick-up detectives revisiting a cold case many years after the original crime was committed.

As a writer of police procedurals, I have found it invaluable. The interview scenes are especially useful. Conducted by trained interview specialists, the days of banging the table and trying to intimidate the suspect into a confession are long gone. In fact, most interviews are 'no comment'. However, there is a real science to effective interviewing, plus a raft of legislation that has to be adhered to.
Equally insightful is the CID office and the team briefings. This is where you get a real sense of the scale of a major murder investigation. As writers, we tend to keep our cast of characters limited, so that readers don't get confused with too many names, and all characters get a chance to shine. In reality there are dozens of police officers and civilian specialists, each of whom plays their part. You should aim to reflect this in your books, without swamping the story with detail and too many featured characters.
It also captures the sheer banality of most murders. Generally speaking, the victims knew each other, and it's less about working out who the suspects are than figuring out what role they played in what transpired. Yet it is still a fascinating watch. Occasionally the investigations are more of a whodunnit, especially some of the special episodes that might have several parts.

If you want your writing to be realistic, you would do well to watch a few episodes of this excellent show.
Do you have any recommendations for useful documentaries? Feel free to comment here or on social media.
Are you a writer with a tip to share? Don't be shy, I'm always looking for guest bloggers or ideas for future posts.

I am going on a brief hiatus for the holiday period. I'll be back in the new year. Until then, happy holidays!
Paul 
0 Comments

TuesdayTips128

13/12/2022

1 Comment


Picture
Editing - you either love it, loathe it or just see it as part of the process.
I've looked before at the issues surrounding editing before (eg #Tips48 for an outline of the basic process; #Tips72 for help chopping the wordcount), but for these posts, I want to share a few of the tips and tricks I've picked up over the years.

A few weeks ago, I wrote a couple of posts about how to use descriptive section titles to help you navigate your document, either in Word (or similar) (#Tips124) or Scrivener (#Tips125). Today I thought I'd share some of the information I include in my descriptive titles.

The purpose of a descriptive section title is to help you quickly navigate to a specific part of your manuscript so that you can edit it, without having to search. Whether you work in Word, and your manuscript is a single document, or in Scrivener, and your project is made of dozens of smaller documents, it can be a real chore finding the bit of your project that you want to add to, delete from or modify.
I therefore add a brief description (just a couple of lines) that tells me what happens in that section. By using styles I can use the navigation pane in Word to jump directly to that section. When the book is finished, it's easy to delete all these section titles. Or, I can simply redact them so they don't spoil the upcoming scene for my beta readers. (See Tips 124 and 125 for how to do this).

My descriptive titles contain a number of pieces of key information.
First, I give each section a unique identifier; typically something like S1001, S1002 etc. These numbers aren't sequential in my document (as I write out of sequence), but you may choose to assign one that is more reflective of the section's position in the story, or perhaps group related scenes together. If I want to add another document that sits between S1001 and S1002, I usually append a letter eg S1001a.
The purpose is to give a very quick way to jump to a section. Eg, when editing a paper draft, I might make a note to 'change the name of the garage in S2003b'. All I have to do is search for 'S2003b'.
I then write a line or two that says what is going to happen in that scene. Eg S1001: Warren called to crime scene, or S3002: Warren discovers name of killer (no reveal yet). This will appear at the beginning of the scene, and since I have applied a heading style, can be clicked in the navigation pane. In Scrivener, I also make sure to use this in the document title, so that it appears in the Binder.

But there is more information that you can add. I find it useful to include the date that the action is taking place. This means that I keep track of timings more easily, and is really helpful if I move scenes around in a story. If I move a scene two days earlier, for example, I can easily spot unchanged dates within the text when editing - eg a phone call now takes place on a Monday, rather than a Wednesday, so I need to change the line "The victim's brother phoned six days after the murder" to "The victim's brother phoned four days after the murder".

In Scrivener, you can include a custom metadata tag. All my documents have the custom metadata fields 'Story_date' and 'Day_Number'. By including (<$custom:Story_Date>) Day (<$custom:Day_Number>) in the descriptive section title, when I compile the output document it will include the date and the day number. Custom metadata is easily changed within the Outliner if you move things around.
Thus a typical section title might look like.
S1003: Warren visits murder scene (Tu 05/11/22) Day (3).
In Scrivener it would look like S1003: Warren visits murder scene (<$custom:Story_Date>) Day (<$custom:Day_Number>), changing to the above when compiled.

One last suggestion. If you switch between Word and Scrivener - for example, you write your document originally in Scrivener, compile and export it to Word, then do edits in Word before importing it back into Scrivener for major changes - your individual documents will be merged into one long document.
You can avoid this by adding an abnormal character in front of the title. Eg ~¬S1003: Warren Visits Murder Scene. When you import your Word document back into Scrivener, choose Import and Split and tell it to split the document using the abnormal character (I add a couple of abnormal characters, so I can do this repeatedly). Hey presto, you get all your subdocuments back!

Do you use descriptive section titles? Do you include additional information to help you navigate your document easily?
Feel free to comment below or on social media.
Until next time.
Paul
1 Comment

TuesdayTips127

6/12/2022

0 Comments


Book Review.
Crime Writing:

How To Write The Science.
Brian Price

Picture
Buy From Amazon.
Today's Tuesday Tip is a book review - Crime Writing: How To Write The Science by Brian Price.
Brian Price is the author of the DC Mel Cotton series. He is also a retired environmental chemist and biologist. In this gem of a book, he sets out to provide a manual to help non-scientists write science in a compelling and accurate manner.
I picked up a copy of this book some time ago, and have been dipping in and out of it since I bought it. It is a fantastic resource, and one that's well-worth the investment.
The breadth of topics covered is exceptionally broad. As one would expect, there is a lot of forensic science, but the book goes well beyond that. For example, the first two chapters cover poisons. This is an area in which Agatha Christie was famous for her in-depth knowledge, however Price goes beyond slipping someone a mickey or poisoning their cream tea. He covers a wide-range of toxic substances, including some common industrial and environmental poisons. A third chapter deals with ways of inducing unconsciousness.


I hang around on a number of writers' forums and how to render a victim insensate is a frequent source of both discussion and frustration. You'd be amazed how many people still think that a bash to the back of the head will produce temporary unconsciousness, from which the hero will awaken, sometime later, with a sore head and 'a mild concussion'. He discusses a number of different substances or methods to stun someone, and dispels the many myths perpetrated in crime fiction.
Later chapters deal with explosives and firearms, methods for killing a person and the all-important disposal of the body and (hopefully) getting away with it.


The reason I recommend this book so highly is its accessibility. Price makes no assumptions about the reader's prior scientific knowledge. Sections are short and snappy, and he includes copious mini case-studies, from both fact and fiction. He also includes practical and legal issues - for example, it's all very well coming up with a fiendish and scientifically plausible way to murder your character, but have you considered how likely it is the killer will actually get their hands on a controlled substance that only medical professionals have access to?
The book is designed as a study guide, and so there is an extensive bibliography at the back pointing towards original sources and further reading, and it is fully indexed.
This isn't a book designed to be read cover-to-cover, rather it is for dipping in and out of, and picking up as a quick primer on a topic; if nothing else it will give you the necessary keywords to search the internet in more detail. It's primary purpose is to introduce the basics and dispel some myths, hopefully helping writers avoid mistakes or perpetuating misconceptions. As a teacher, I would heartily recommend this book to students for its clarity, and as an author, would recommend it to any crime writers, fledgling or experienced.


One last thing. As a science teacher and experienced writer, much of what was in the book wasn't entirely new to me. Yet I still found it a source of inspiration. Flicking through the contents pages, I found myself drawn to random topics or fascinating case studies. And you know what, I wouldn't be surprised if my next books have some plot points inspired by what I've read!


You can learn more about writing science accurately and contact Brian Price at www.crimewriterscience.co.uk. You can read more about Brian's writing by visiting his website https://www.brianpriceauthor.co.uk/.
0 Comments

TuesdayTips126

29/11/2022

0 Comments


Conversations With Their Creations
Author Stuart Field in conversation with Ronin Nash

Picture
Today's #TuesdayTip is another #ConversationsWithTheirCreations.
The premise is simple - an author conducts an interview with one of their characters. I leave it up to them how they wish to interpret that brief.
​I am thrilled to invite back thriller writer Stuart Field to chat with his latest creation, Ronin Nash.

A former soldier, Stuart now works as an armed security guard. He was born in the West Midlands, and is married with one daughter.
A busy man, he is the author of the John Steel series, soon to number six entries, the new Ronin Nash series, and has just published the first in a new, two-book series, A Friend Of The Family.  ​
My name is Stuart Field, and I am here with Special Agent Ronin Nash. Today we will discuss his life and his latest case, which was documented in my latest novel, Nobody’s Agent; Ronin Nash, thriller book 1.
Me:  So, Ronin, tell us about yourself.
Nash: Hi Stuart, thanks for having me today. Well, my name is Ronin Nash, and I work for a new government agency which is called the Interagency Investigation Bureau. I was born in Edinburgh, Scotland but didn’t stay there long. My father was in the British army, and we moved around a lot. He was in the Black Watch regiment. My mother was born and grew up in Manhattan, New York. Apparently, they got together after a fling they had when he was on R&R from an exercise in Canada.
We finally moved to Manhattan when I was in my teens after my dad retired from the army and bought a bar in Manhattan. Mac’s bar is called. Anyway, I went through college and finally joined the army. After a few years, I joined the Rangers. I was happy enough there, but after a friend was murdered and I investigated, I got snatched up by CID. Things went ok there until a joint op with the FBI; then, I got snatched up by the feds.
Me: Sounds like an exciting life you’ve had. So how come you are with the IIB?
Nash. There were some problems with my last year in the Bureau, namely one of my work colleagues was a dick. There was an incident, and I left. But after about a year, my old boss, soon to be my new one, asked me to join the IIB on one case, and I guess I just decided to stay afterward.
Me: I see you don’t like to dress like the other agents. Is there a reason?’
Nash: I was never much one for rules I felt were…unnecessary. The whole Brooks Brothers costume was not my thing. For one, it made you stand out. Criminals could see you coming a mile off. Besides, I knew it irritated the hell out of people, so it was a win-win in my book.  I like to dress practically, that is why I prefer jeans or chinos to suit pants. Work or military style boots to shiny shoes. When I dress for an investigation, I don’t want to worry if I’m gonna get my pants dirty or scuff my shiny shoes. And you tried running in those shoes? You get blisters.
Me: So, tell us about the case in, Nobody’s Agent.
Nash: It is set in a small town called Finchley. This is in upstate New York near Albany. The sheriff had discovered three bodies, and it was my job as an IIB agent to go there and assess whether it was a case for the cops or the FBI or, indeed, just an accident. As it turned out, there was more waiting for me in Finchley than I first thought.
Me: Well, unfortunately, that is all we have time for. So thanks to Ronin Nash, and to find out more, check out: www.amazon.co.uk/Nobodys-Agent-Stuart-Field/dp/B09ZCSW3BM
You can find out more about Stuart by visiting his website, following him on Twitter or Instagram, or visiting his Facebook Page.
As always feel free to comment here or on social media. 

If you are a writer with a suggestion for a #TuesdayTip, feel free to email me at DCIJones@Outlook.com.
Until the next time,
​Paul.
0 Comments

TuesdayTips125

22/11/2022

0 Comments


​Editing Hacks
Navigating Scrivener With Style(S)

Picture
In last week's blog #Tips124, I discussed how to use the style function to navigate your document in Word (or similar word processing packages).
This week, I want to extend that to the specialist writing package Scrivener (visit #Tips80 for my first impressions of using Scrivener).
Now the first thing that regular users of Scrivener are going to say, is "You don't need to use styles to navigate Scrivener, that's the whole point of it!" That's correct, so let me clarify. I am going to look at how to retain styles when exporting to MS Word. Then you can easily navigate your manuscript in Word when you are working with an editor who doesn't use Scrivener.

For ease of use when writing in Scrivener I start a new page for each new scene. This allows me to then easily move scenes around. (I add chapter and section breaks last, once I am satisfied the story is in a logical order.)
In the image below, you can see that I have added some descriptive text for the first scene in bold red text.
Picture
As in last week's tip, I use this as a quick aide memoire of what happens in that scene. The power of Scrivener of course, is that I can add detailed notes etc in the right-hand inspector column, but they won't easily come across to Word when I compile, so I like to have that scene title.
It is important that rather than just highlighting the text and formatting it, you should apply a style to it.
This works very similar to the way it does in Word. You can use a pre-installed one, or make your own. I recommend creating your own, and giving it an easy to remember name. This will make things easier later on.
Tip: Set up a template with your styles already applied to save time.

Now comes the (slightly) fiddly bit. For those unfamiliar with Scrivener, you don't typically print directly from the programme. Instead, you compile all the individual pages into one file and export it as a manuscript in the file type of your choosing. If you select MS Word, you'll get a .docx file that can then be opened in Word.
Opening the document as below, you can see that whilst the bold red text is present, the titles aren't appearing in the left-hand navigation pane (which is the whole point of the exercise), nor is it listed in the style gallery (circled in red).
Picture
Instead, you need to tell Word that the style you defined in Scrivener (and which has been brought across, it's just invisible) is important, and that you want Word to recognise it and use it.
To do this, go to the style gallery and select the Apply Styles option.
Picture
​Next, select the name of the style that you defined in Scrivener (I call mine Section Header), then modify. 
You can now adjust the appearance of the style if you want to, but the most important thing to do is click 
"Add to the Styles gallery". It is now part of the styles gallery, meaning you can apply that style to other sections of text or easily modify it (eg redact it, so that your beta readers don't see spoilers).
Picture
In order to see it in the left-hand navigation pane, you need to do one more thing. Select the style from the gallery by right-clicking. Then choose modify.
Select the Format option, then Paragraph from the menu.
Select the Outline Level drop down box.
​Body text is basic text, it doesn't appear in the navigation pane. Levels 1 to 9 appear in the navigation pane (and outline view), in decreasing order of importance.
Picture
I have chosen Level 1 from the outline level, and you can now see that it is in the navigation pane. Text that is Level 2 would be indented slightly and so on.
Picture
The beauty of using styles to do this, is that you only need to do it once, and every title in your manuscript is updated in one go.

Have you got any useful tips for using styles? Feel free to comment here or on social media.
And don't forget, if you are a writer with a tip to share, email me at DCIJones@outlook.com.
Until next week,
Paul
0 Comments

TuesdayTips124

15/11/2022

0 Comments


Editing Hacks
Navigating With Style(s)

Picture
Editing - you either love it, loathe it or just see it as part of the process.
I've looked at the issues surrounding editing before (eg #Tips48 for an outline of the basic process; #Tips72 for help chopping the wordcount), but for these posts, I want to share a few of the tips and tricks I've picked up over the years.
Today's #TuesdayTip looks at how the use of styles can help you navigate your manuscript, and keep track of where you are. I will be focusing on MS Word, but the principles are broadly applicable to other word processing packages. I will be writing another blog post extending this to Scrivener and how you can import it into Word.
First of all, what are styles?
Styles are, in their simplest form, a way to apply pre-determined formatting to a piece of text with a single click of the mouse. Imagine you have a piece of text. Word applies a default set of formats to it when you open a blank document. You can then choose a different font, the font size, and modifications such as whether or not the text is BOLD, Underlined, italicised, or a different colour. Delve a little deeper into the paragraph settings and you can decide how the text is aligned, spaced, or add bullet points etc.
This is all well and good, but it may take you several clicks to get the text just the way you want it. And it can be time-consuming if you have to do that each time you start a new document. And what if you have several different types of text within a single document, for example a title, or you prefer to format quoted text differently from the main text?
This is where styles come in useful. Word has a series of different styles built-in, that you can select from the style gallery. All you need to do is select the text you want, and apply a style by clicking on it in the style gallery.
Picture
So how does a style help you navigate a manuscript?
Well styles have a hierarchy and this affects whether they appear in the left hand Navigation Pane. You can think of this as rather like a bookmark that can help you navigate the document by jumping to a section.
In the image below, you can see that I have written two chunks of text, with two titles separating them. The Navigation Pane is currently empty, with just some text from MS explaining what the pane is for.
Picture
In the next image, I have highlighted the two titles and applied the style Heading 1. Not only do they now look different, they are also listed in the Navigation Pane. If I want to jump around my document, I can easily do so by clicking the link in the navigation pane.
Picture
This is a great way to insert chapter breaks. You can easily jump from chapter to chapter by clicking on the relevant chapter in the Navigation Pane.
But this only scratches the surface of what styles can do.
I use them to navigate between scenes. When I start to write a new scene, I like to put a title with a couple of lines of descriptive text. This reminds me what happens in that scene. By applying a style to that text, I can navigate my document by going directly to that scene; useful if I have no idea which chapter something actually occurs in.
Top Tip: Choose a different style than the one that you applied to your chapter heading.

You can see in this next image that not only does my descriptive text appear different in the document to both the chapter and the main text, it is also indented slightly on the Navigation Pane.
Picture
Finishing up.
Now obviously, at some point you are going to want to share this document with beta readers, and eventually publish. The last thing you want is to leave those spoilers in.

First of all, removing that descriptive text is easy. If you right click the style in the gallery, you will get a simple context menu. If you choose "Select All", then it will highlight all instances of that style in one go. Hit delete and it is gone.
(Another advantage of "Select All" is that it does a word count for the selected text. So if you are over your word count, you can see how many of those extra words are descriptive text that you will be deleting before publishing.)
Picture
But don't jump the gun and delete these useful navigation tools too soon. You may want to use them when doing later edits. Furthermore, deleting them changes the pagination. For example. when I send the manuscript to my beta readers or other editors, they often give me feedback in the form of "There is a typo on the third line of page 26." However, if you have deleted the descriptive text, then the page numbers for the text may have shifted.
So instead, before sending to my beta readers or editors, I leave the descriptive text in place and redact it so the spacing stays the same, but spoilers are hidden and I can still navigate the document.
To do this, simply right click the style again and choose "Modify".
Now you can change the formatting of the style.
I turn the font to black (not automatic) and from the borders option select black for the fill option. It's not pretty, but it hides the spoilers and I can easily reverse it if I choose to do so.
Picture
This is just a basic outline of how to use styles. Over the years, I've tweaked my method so it fulfils my own particular needs. I also use my own custom style rather than one of the built-in styles.
I hope this was useful. Do you have any useful tips like this?
If so, please feel free to comment here or on social media. If you are a writer with your own tip to share, then please don't be shy about emailing me on dcijones@outlook.com, I'm always looking for guest bloggers.
Until next time,
Paul
0 Comments

TuesdayTips123

8/11/2022

0 Comments


Guest Blogger
Stuart Field

The Benefits Of Travelling For Research

Picture
For this week's #TuesdayTip, I am thrilled to invite thriller writer Stuart Field to tell us about the benefits of travelling for research.
A former soldier, Stuart now works as an armed security guard. He was born in the West Midlands, and is married with one daughter.
A busy man, he is the author of the John Steel series, soon to number six entries, the new Ronin Nash series, and has just published the first in a new, two-book series, A Friend Of The Family.  
Stuart's Tip
Travel and do research on your locations:
  • Try and see the places you are writing about. Doing research on the internet is a must, but being there is better.  That way, you can get the feel for the place, the aromas, and the people. Also, it can help answer questions about situations your character might face. You might look at a street or a walkway in the hills and think it is perfect, and then when you see it for real, you find your idea isn’t feasible. Try the local foods and drinks. Put yourself in your character’s shoes.
  • Also, remember, if you are writing about a city such as New York, London, etc, if you need to put in a diner, a hotel, or even a gas station, make sure it is feasible to do so. Don’t try and put one of these where it is obvious there is a skyscraper or other structure. Doing research on locations is a must because a reader who lives in that city will pick it up.
  • However, if you find a city or actual place that doesn’t work for your idea, make one up. That way, you can put what you want in the town, and nobody can pick you up. It is a simple solution, but be careful, because you may still have to research the area you are about to put your new town. 
  • The best tip is to have fun in your writing. 
(c) 2022 Stuart Field.

You can find out more about Stuart by visiting his website, following him on Twitter or Instagram, or visiting his Facebook Page.
As always feel free to comment here or on social media. 

If you are a writer with a suggestion for a #TuesdayTip, feel free to email me at DCIJones@Outlook.com.
Until the next time,
​Paul.

0 Comments

TuesdayTips122

1/11/2022

0 Comments


Editing Hacks
A Comment On The Process

Picture
Editing - you either love it, loathe it or just see it as part of the process.
I've looked before at the issues surrounding editing before (eg #Tips48 for an outline of the basic process; #Tips72 for help chopping the wordcount), but for these posts, I want to share a few of the tips and tricks I've picked up over the years.

Whether you use a dedicated writing package or a standard word processor, the chances are that at some point you will have to send your manuscript to your editor in a Word file or a format compatible with Word (.docx). They are then likely to send back the manuscript with suggested revisions, using the review function. This week's post suggests a couple of tips to make this process easier, and to avoid introducing more mistakes into the manuscript (easily done, believe me).

The first thing you need to do is make sure you have turned on "Track Changes".
This can be found in the Review tab on Word. This means that anything you delete or add will be recorded. For example:
Picture
Picture
You can see here that I have deleted the word "using" and replaced it with "with the" and I have added the word "feature" at the end. I have also increased the font size to sixteen. The red underlined text shows these differences. They are also listed on the right-hand-side. This is a powerful function, and is especially useful during copy edits or feedback from proof readers.
If your proof reader suggests a change, you can either accept the change, choose to leave it as it was, or change it to how you would like it to look.
However, if a sentence has been modified too much, it can become very confusing, and it is easy to add additional errors. Therefore, a useful trick is to toggle the" show mark up" option on or off. 
Picture
Switching it back to "No Mark up" will remove all the red text and strike throughs and show you how it will look in the final document. The changes you have made are still there, but it is much easier to check that it looks the way you want it to.
Picture
If you are making lots of changes to a paragraph, you can do this before you start editing it. The changes are still recorded, but it feels much more natural - you are simply changing some text to the way that you want it. 
Using the Comment Function.
Whether you are using a word processor or Scrivener, there is the option to highlight text with a comment.
Comments are really useful, and I recommend using them as you are writing. For example, if a sentence isn't behaving itself, rather than waste ages getting it to look exactly how I want it and breaking my flow, I highlight it and write "Ugh" in the comments box. Then I can easily find it again and change the wording at a future date. I might also make notes, such as "does this match exactly what they found at the crime scene?" to remind me to go back and check, or instructions such as "Check capitalisation" if I've used a brand name (my current work in process has the word Screwfix. Is the F capitalised? - I can look that up on the internet when I have a spare moment, rather than breaking my flow).
Comments won't be printed in the final draft, unless you specifically turn that on in the print options. I'm old-school and like to print a draft to mark with red pen. Therefore, I print it with the comments turned on. They appear in a strip along the right-hand-side of the page and remind me of things that need doing. When I print a copy for my beta readers, I turn off the option, so they don't see spoilers or my notes.

Your editors might also include comments for you to consider. For example, querying if a character has been described in this way previously, or suggesting a change to the pace. In Word, there is an option to reply to a comment. I have started doing this, so my editor can easily find what changes I have or haven't made. I may even justify why I have decided not to make that change and ask for their thoughts.
When you have finished with a comment, it is tempting to delete that comment to tidy the document. In newer versions of Word, there is now the option to mark a comment as "resolved". The comment is still there, but it is faded out. The advantage of this, is that you can reopen the comment if necessary. It also stops you from duplicating effort. In the Screwfix example above, resolving the comment, rather than deleting it, reminds me that I have actually looked it up, and that the F in Screwfix isn't capitalised.
Show/Hide Nonprinting Characters
Finally, this is something that I have found very useful.
If you look at the home tab in your writing software, you will see this symbol. 
Picture
It looks like a backwards "P".
If you turn it on, a whole array of "invisible" characters become visible. These include a dot where there is a space, the backwards P denotes a carriage return (when you end a paragraph and start a new one), and dotted lines, showing page or section breaks. You can see in the previous screenshots that I have it turned on. Not everyone likes this, as it makes the page messy. But over the years, I've learned to write with this turned on permanently. The advantage is that you can easily see if you have included a double space, or if the text at the bottom of a page is followed by a page break, or if it has just rolled over onto the next page.

I hope you find these tips useful. As always, feel free to comment here or on social media. If you have something that you would like to share in a future #TuesdayTip, feel free to email me on dcijones@outlook.com.
Until next time,
Paul
0 Comments
<<Previous
Forward>>
    To increase the range of topics on this blog, I am inviting Guest Bloggers to share their writing tips.
    If you are an author and would like to be featured, please email me. 

    Author

    Paul Gitsham is the writer of the DCI Warren Jones series.

    I don't claim to be an expert, but after more than 10 books, I think I've picked up a few things along the way.

    All material copyright Paul Gitsham (c) 2020-23.

    Please feel free to share, but you must include a link back to this site and credit Paul Gitsham.

    RSS Feed

    Useful Topics
    • Reviews of Writing Books​
    • ​Writing Exercises/ Writers' Block Tips​
    • ​Interviews
    ​

    Categories

    All
    Author Interview
    Backstory
    Block Buster
    Book Review
    Character Voice
    #ConversationsWithTheirCreations
    CSI
    DCI Jones
    DCI Warren Jones
    DNA Evidence
    Editing Hacks
    Fantasy
    Forensics
    GB Williams
    Geraldine Steel
    Guest Blog
    Historical Fiction
    #JackReacher
    Jason Monaghan
    Jonathan Wilkins
    Kate Bendelow
    Kill Your Darlings
    #LeeChild
    Leigh Russell
    Mobile Phones
    Modern Technology
    MS Word
    Musings
    Police Procedure
    Poppy
    #RecommendedRead
    Research
    Scrivener
    Social Media
    Stephen King
    Stuart Field
    #TuesdayTips
    UK Policing
    Web Of Lies
    WhatsInAName
    Writer's Block
    Writing Craft
    Writing Tips


    Archives

    March 2023
    February 2023
    January 2023
    December 2022
    November 2022
    October 2022
    September 2022
    August 2022
    July 2022
    June 2022
    May 2022
    April 2022
    March 2022
    February 2022
    January 2022
    December 2021
    November 2021
    October 2021
    September 2021
    August 2021
    June 2021
    May 2021
    April 2021
    March 2021
    February 2021
    January 2021
    December 2020
    November 2020
    October 2020
    September 2020
    August 2020

    Disclosure: I am a member of both the Amazon and Bookshop.org affiliates programs, meaning that I get a small commission everytime a book is purchased using links from my site.
Powered by Create your own unique website with customizable templates.
  • Welcome!
  • News
  • Books
  • Blogs
    • Writing Tips
    • Recommended
  • Newsletter